How To Flush A Radiator With A Garden Hose
How To Flush A Radiator With A Garden Hose
How To Flush A Radiator With A Garden Hose
Flushing a radiator with a garden hose is a simple, cost-effective, and efficient way to effectively clean out excess dirt and debris that tends to build up within the radiator, helping to keep it working in peak condition. Flushing with a garden hose is an easy process, but before beginning, make sure that the radiator has been sufficiently drained of any coolant. Here, we provide a comprehensive overview of everything you need to know for how to flush out a radiator using a garden hose.
Set Up Your Supplies & Prepare Your Vehicle
Before moving on to the flushing process itself, it's essential to prepare the necessary supplies and the vehicle for the process. As briefly mentioned above, the purpose of the garden hose in this case is to provide high pressure water to rid the radiator of any excess buildup. To accomplish this, first, you must make sure the radiator is properly drained, which can typically be achieved through a drain plug or petcock located at the bottom of the radiator.
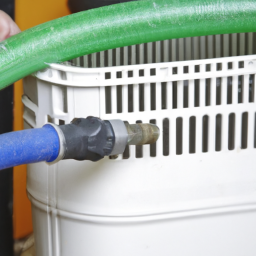
Once the radiator has been sufficiently drained of any existing coolant or fluid, turn off the engine and ensure the radiator is entirely cooled off. To assist the process, one can move the vehicle under some shade to help the radiator cool in a quicker amount of time. Then, you'll need to connect the garden hose, ensuring that you have attached the appropriate adaptors to your specific radiator hose. When doing this, always make sure to double check that the hose is firmly connected on both ends.
Connect the Hose & Begin Flushing the Radiator
Once the hose is connected and the engine has cooled off, turn on the garden hose and start the flushing process. If yours is equipped with it, use the highest pressure setting possible, allowing the sufficient amount of water to flush away any dirt, rust, grime, etc. that may have built up in the radiator. Begin the process at the lower end of the radiator, keeping the pressure and flow directed downward. To ensure a thorough clean, allow for a few minutes with water flowing freely. Once you've gone through both sides several times, feel free to move to the top in a similar pattern. Continue to do so until you've thoroughly flushed the entire radiator.
Check the Radiator & Reconnect to Coolant System
Once you feel that the radiator has been sufficiently flushed, move to the last step and disconnect the garden hose. To ensure that the job has been done properly, check the inside of the radiator, ensuring that all the dirt and debris has been adequately removed, and that all the hoses and connections are properly reattached. If all looks good internally, reconnect the radiator to the coolant system, sufficiently refilling with fresh coolant.
In Summary
Flushing a radiator with a garden hose is a simple and cost-effective way of ensuring that it stays free of dirt and other buildup. Before beginning the flushing process, make sure your supplies are ready and the radiator has been appropriately drained and cooled. Connect the garden hose, begin the flushing process from the bottom up, and then check the radiator for any remaining debris. Lastly, adequately refill the radiator with fresh coolant and keep your vehicle running in peak condition.
Previous Page
Next Page